Showing posts with label crafty. Show all posts

Sunday, April 29, 2012

New Lights

We were eating at Ma Fia's Pizza in Opelika Alabama, did I mention they have excellent food?  Anyway, you can check out their restaurant here  Ma-Fias.com Gallery and look at the lights on the third and fourth pics.  I thought that might be something I could do.

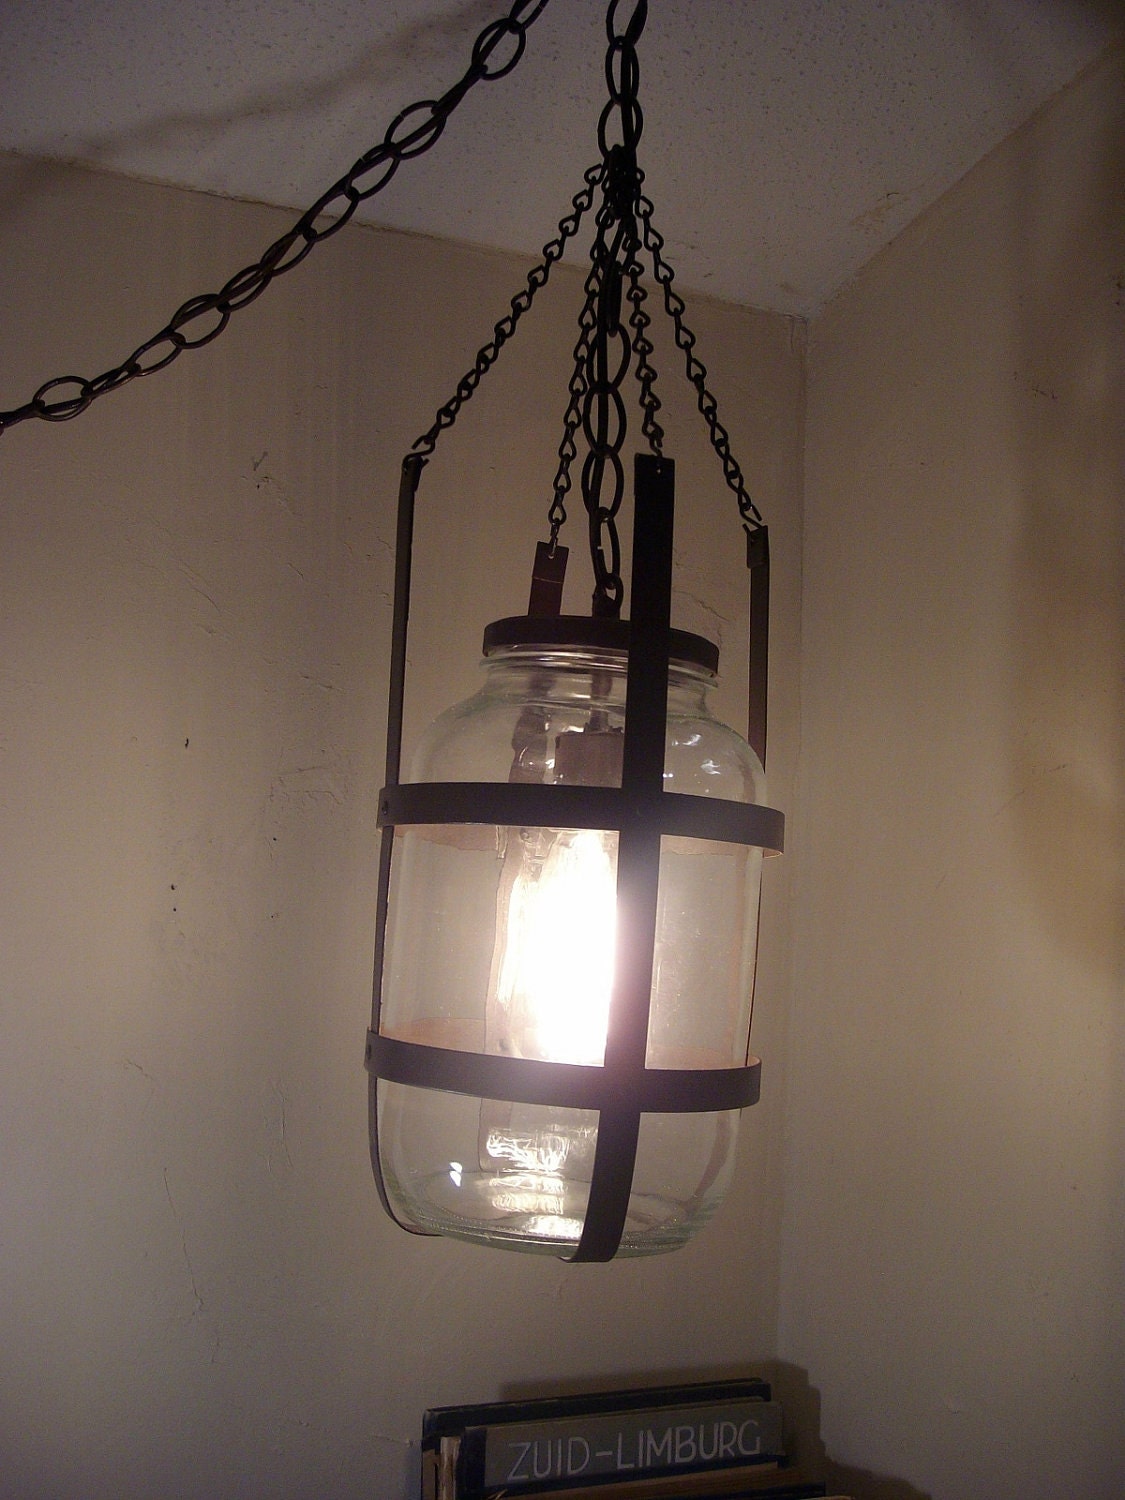
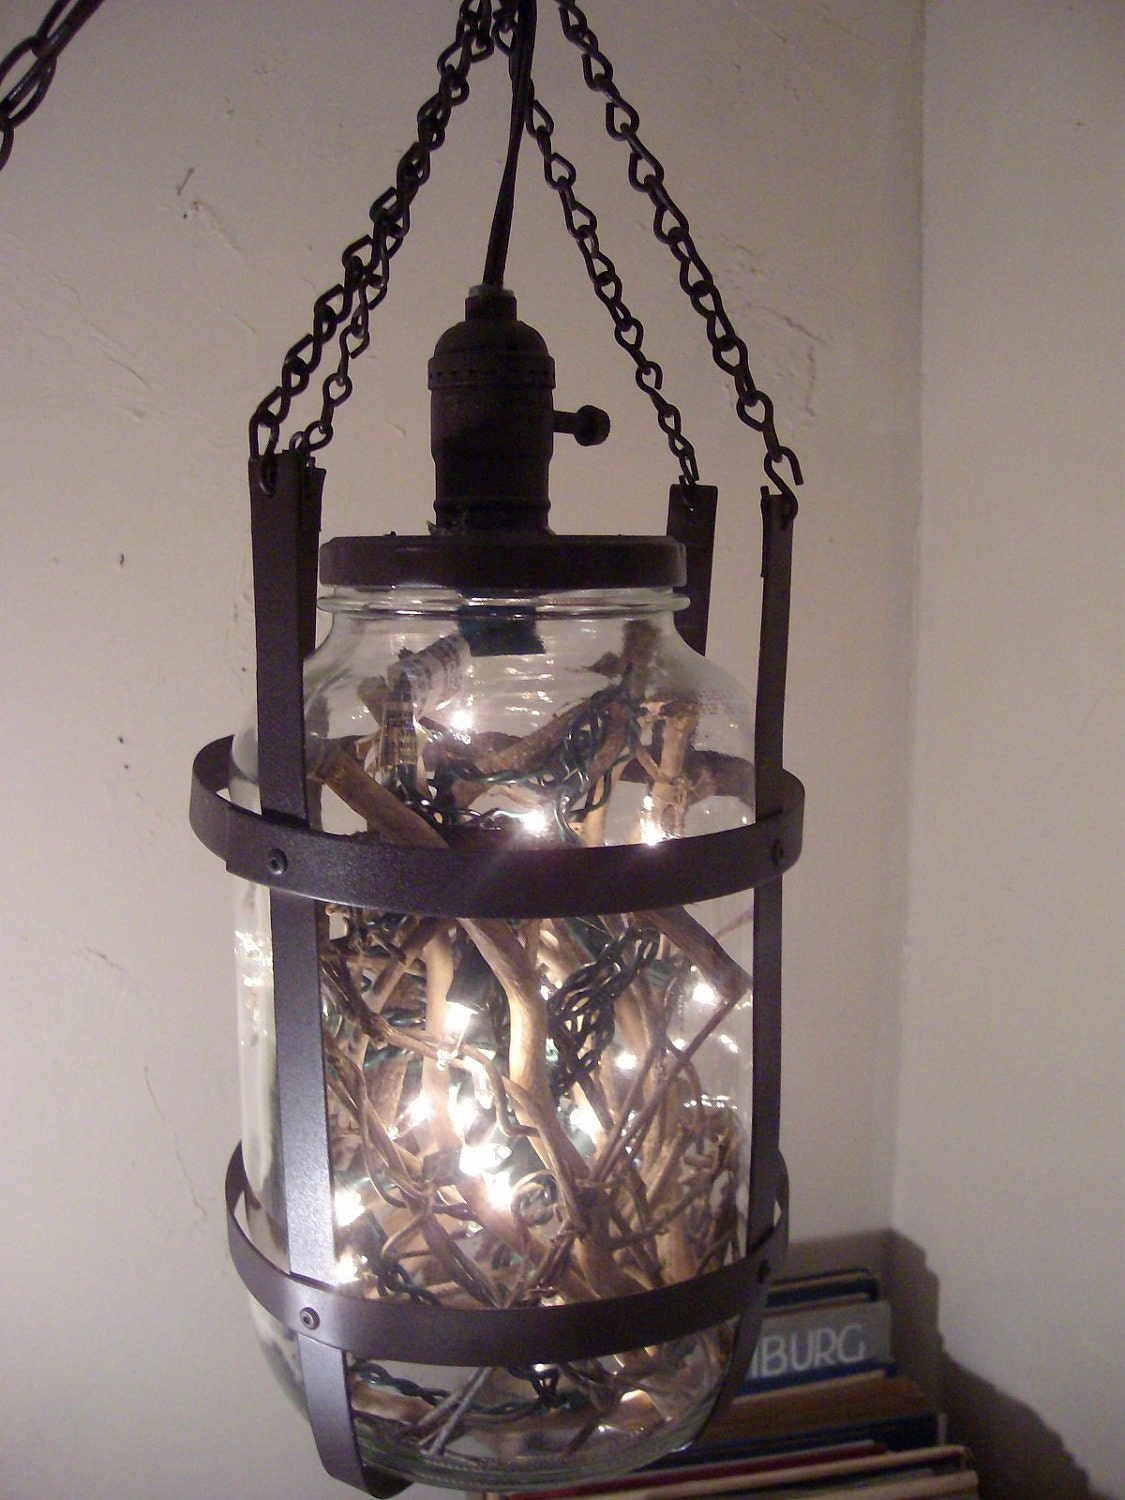
While I don't have beautiful jugs like those, I did find some large pickle jars.  I sheared thin pieces of sheet metal at work and pop riveted the frames together.  One jar contains Xmas lights and curvy vines, the other has a vintage filament bulb. 


 I do have a large 5 gallon glass jug I plan to make a hanging frame for but I haven't figured out the lighting.  My wife is listing these babies on Etsy as I type and I will put them at Old South Antique Mall tonight or in the morning.

Here is a link to our place on Etsy, where you can find other items and more pics of each light.  KGilbertDesigns on Etsy

Sunday, February 19, 2012

Home Made Kid's Desk

So they said Alysa needs a desk and asked if I could build one out of two old closet doors. No problem. I am a man after all, and a man knows how to delegate, so while the ladies went shopping I put Alysa to work building her desk.

Here she is marking a cut line 50" from the end.


Hey, I don't want to use your tape measure she says, so she gets her tool set and drill we gave her for her eleventh birthday.


That's a handy little tool bag from Walmart. They also have it in black, if pink is not your color.


Take that hardware off, we don't need it. Righty tighty - lefty loosey.


The little circular saw is mine and is very easy to handle.


Here she is cutting the door. The little saw only cuts 3/4" deep so we had to flip it over and cut again.


Grandmommie seemed surprised that she did all the cutting. No problem, she wore safety glasses. Circular saws are notorious for getting sawdust into your eyes.


The problem with using a hollow core door is that the inside is only framed around the perimeter. After cutting the desk top 50" long, one end is hollow so I cut a piece off the top to insert into the end.


Then Alysa sanded it smooth. Like her new sander? $25 at Harbor Freight.


Then we put some glue on each side and she put it into the hollow area.


Ugh, it won't go in.


No problem, use the hammer to knock it in.


You go girl.


While that was drying we cut the other door into two 29" pieces to make the legs.


Next, I cut some braces with my full size saw. Her little fingers were tired and the little saw was charging.


I got her to sand the braces down to the wood so the glue would stick well.


Next she drilled pilot holes for the screws to go into. Pilot holes are very helpful with alignment and keep the wood from splitting.


I just bought a new pack of drill bits and I knew one or two would be sacrificed during this part but she held the drill steady and straight. No drill bits were broken.

That's my hand holding the brace.


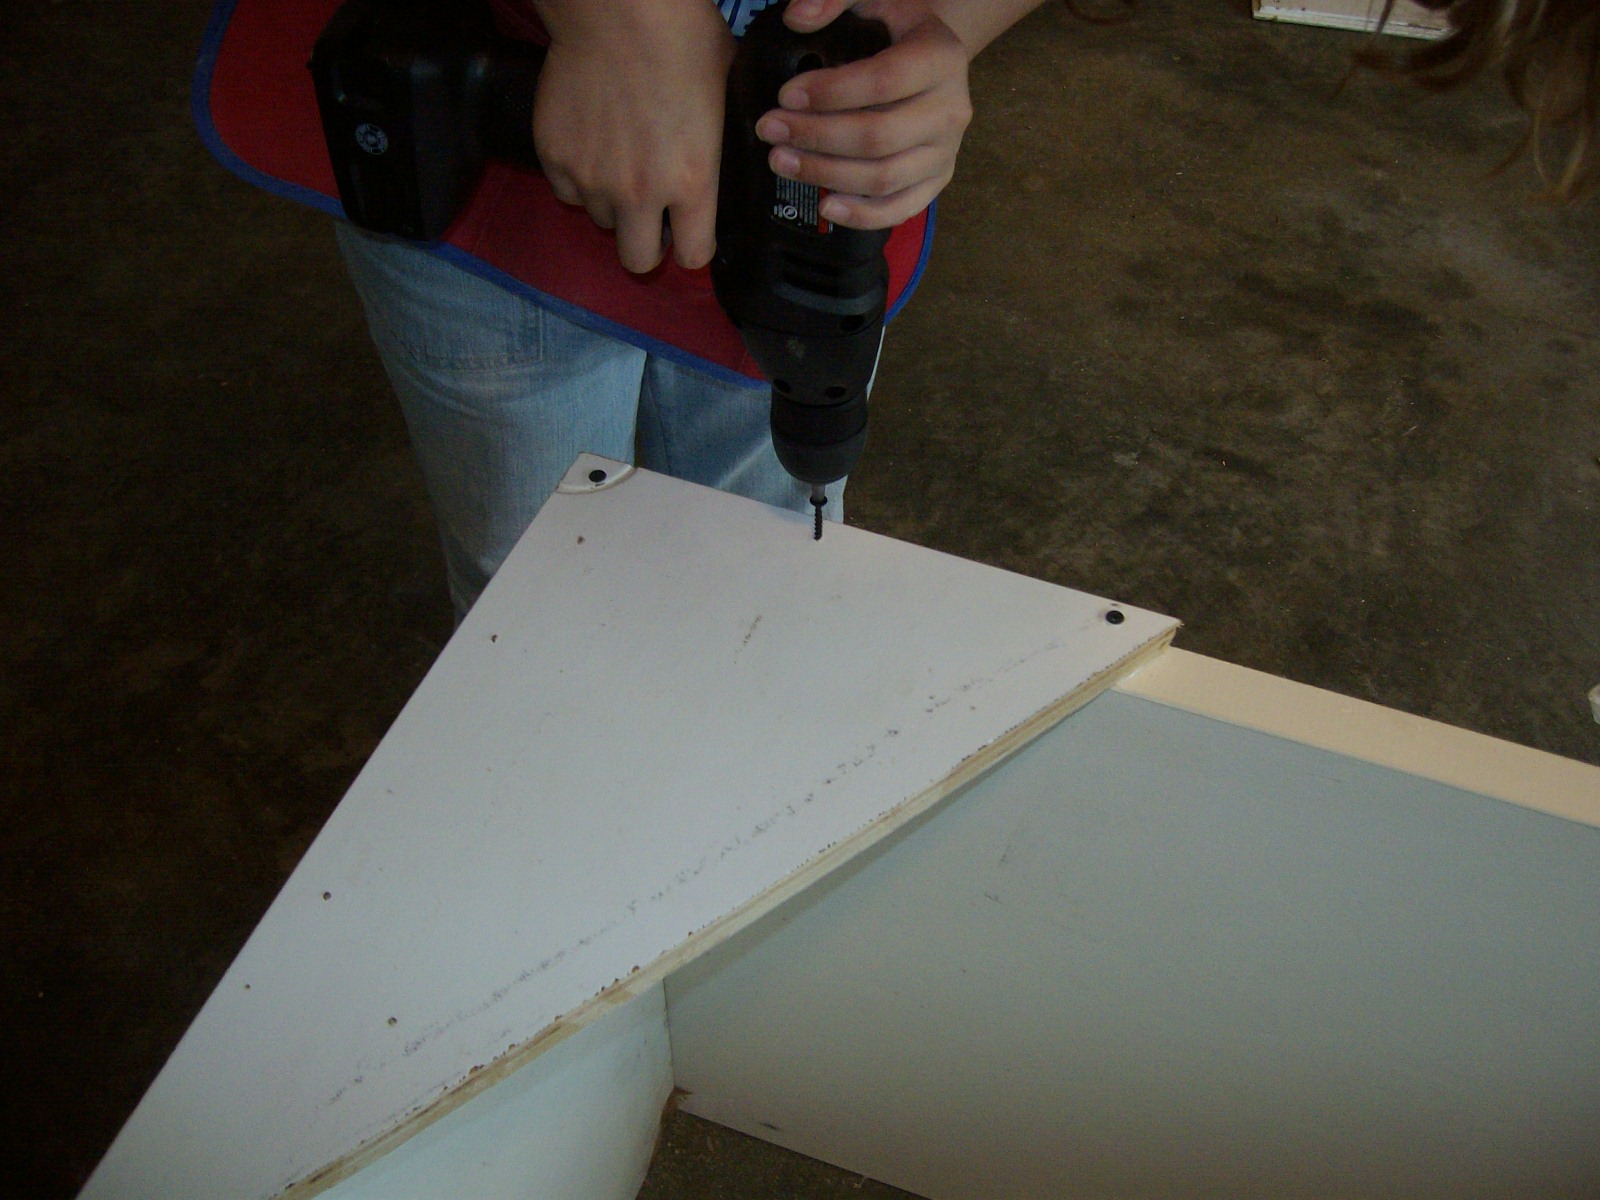
Then Alysa screwed each of the twelve screws through the braces and into the desk top and sides.


Here she is putting the last few screws in. I told her to push hard and she did. I only had to give three of them an extra twist with the drill to get them down a little more.


And here she is with her finished desk.


This work session was brought to you by Chill Yogurt, which we visited after the strenuous build.


Here we are both in the picture showing off the various tools used, she is checking to make sure the desk is level and I am acting like I am measuring something.


After the build she wanted it painted this avocado color. This Valspar paint is excellent.

Well it was a great way to spend a rainy afternoon. I should have taken a picture of the painted desk. After the paint cures in a few days, they will move it into her room and her things on it. I hope to get a picture then.

So how much did each of us do? I trimmed the insert for the hollow core end, cut the braces with a bigger saw because the little one needed to charge, and I drove the screws through the desk top into the top of the legs while she helped hold them. All of the other measuring, cutting, sanding, drilling, gluing , and screwing was done by her. Can your eleven year old accomplish a project like this? Sure they can with help and direction.

My wife wants some bookcases built for our den. We might have to schedule a spend the night party with Alysa.


Monday, February 6, 2012

White Table, Black Vanity

This table started out as a standard wood finish 3' x 5' boring thing. You know we won't stand for that. I sanded it with my DeWalt just to get the shine and a few scratches off.

Then I spray painted it with the cheap flat white spray paint. This one took about 8 cans. I had to spray three coats to get good coverage.

Don't forget to wear some kind of breathing protection. I didn't and I was coughing spray paint in the shower that night.


I wasn't satisfied with a plain white table so I used a straight edge and a flat head screw driver to score lines to simulate separate boards.

Then I got the stain and went to work rubbing. Just a little and rub it in to make the table look aged and dirty. Yes, my arms were killing me at this point. I had already done the black vanity below.


Here is a closeup of the staining. Strangely, this project came out finished with just the staining. I didn't have to wax it. Maybe it was from using less stain than I did on the vanity or the difference in paint color. When I do a piece in black I soak it with stain to give a rich color and wet look, but I have to rub it a lot to get the extra stain off or it will be sticky.


Here is the finished table sitting in my wife's booth at the front of Old South Antique Mall - $85 Sorry but it has been SOLD


The vanity before I started. I had to glue a few pieces and sand the top back to the wood. This piece is on casters and would also make a nice desk. I painted it with flat black spray paint, and sanded it back to the wood in several places to give it an aged look. Then I gave it a good wash in stain. I didn't sand it enough in some places so I rubbed extra hard to get the paint off to show the wood.


Here's a closeup of it sitting in my wife's booth. She has already put things on it like some beautiful woman has been sitting there doing her makeup.


That's me taking a picture, notice how large the mirror is. Yes I am wearing short pants. This has been the best winter ever.

Vanity with mirror is $125


Here's some stuff from my booth.
Floating duck decoys - $18 each, very nice
Ancient paddle and pot stirrer - $30 each
Full set of Pool Balls - $25
Metal Tool Box - $18
various wine bottles - $1 to $1.50


Here's a rocking horse in her booth - $65


This is a candle maker's dream come true. An old metal bucket filled with probably a million baby food jars. Most are small, some are tall. $10 for the whole thing. Take the bucket with you.


My wife labeled the tree trunk club as a "shaker" but it is too heavy to shake. Few men have the strength to wield this thing. It is very heavy and has a nice patina - $30


That's some good rope for a swing in the crate below. 1" diameter and about fifty feet long - $12.


Real bowling pins - $19.95 for the set of three
Very large wine bottle - $10
Can't see it but there is a nylon holster hanging on that rack for $8


Great old army plaque, can't remember the dude's name.


Saturday, January 14, 2012

How to get that shabby chic look.

Shabby Chic is a look that has been done again and again in our antique booth. And why not, people love it and it is so easy. You can do it too. The following example is in black.


Here we have a little cabinet with a drawer and door. Refinishing the wood to perfection is not something I do, as you know I do most of my work on the deck or in the back yard. Sometimes it is fun. With the shabby look you don't have to worry about mistakes, because you are making a piece look aged in a short period of time.


This piece is made of all, real wood, but has a large crack in the top and some knots that, with age, have separated. I sanded it with our orbital sander to get the varnish off. The varnish had dried to the point I could easily scratch it off with my fingernail. Remember you need to feed your furniture, especially if you have a piece in direct sunlight with Beeswax or Orange Oil at least once a month.


Once you got it somewhat smooth spray paint it with a cheap flat black spray. It took three coats to get the coverage I needed and remember, don't worry about runs. After the paint is dry you go over it with the orbital sander again with a fine grit sand paper. You take away paint to expose the wood beneath. There is no way to go wrong here. You want it to look as if it has aged for decades. If for some reason you are not happy with what you have sanded, repaint it and sand again. Yes it is just that easy. I have done this so many times that sometimes I am not satisfied with my results and my wife says it looks fine, throw it in there because the booth is empty. It is some of those pieces we get the most compliments on.

Our ancient Chinese secret is to wipe the piece with a dark stain after sanding. It brings out the color in the wood and gives an overall richness. Also if you do a piece in white it gives a nice dingy color. After your stain has cured/dried you can give it a clear coat or a hand rubbed wax. I like using the Beeswax.


Here is a closeup of the top, notice you can see the detail of the wood through the paint. This is a dirty job. Sanding the piece can produce a lot of dust. Spray paint gets everywhere, especially in the nose. The stain is the dirtiest part. I don't play around with a brush. Cut 5" x 5" square out of an old t-shirt then soak it in stain and start wiping. Gloves, you don't need no stinking gloves. Rubber gloves you steal from the doc's office disintegrate from a chemical reaction to the stain. Canvas work gloves soak through and stain the fingers. I have used a thick oyster shucking gloves but they are so clumsy you can't get the dexterity needed to move quickly and get into those tight places. Just keep a can of paint thinner handy and soak your hands, after a few days, the stain comes out from under the fingernails. If anyone asks in the mean time tell them a bus load of gypsies broke down on the side of the road and you had to change their oil. In return they gave you this old piece of furniture, must be really old, look at how distressed it is, yeah, I guess I will take $45 for it.

Mr. Hedley was no help at all, he slept all day.

Well, I was going to post a pic of the piece sitting in the mall, but it has already sold. We sat it in just as they were closing and it sold within 30 minutes of being open the next day.

Notice I said it was made from real wood. If you get a piece with press board or fiber board it will swell from the water in the paint. Stay away from these pieces. It is possible to spray paint a piece of Formica but you can't sand it back to the wood after painting.

Tuesday, May 24, 2011

Chair Repair

My wife and I refurbish and re-purpose old furniture pieces, as you can see from her blog.  K. Gilbert Designs & Unique Finds  Pictured below is a pair of confusing chairs.  Confusing because I wonder why someone would make an incomplete chair with a thin piece of press board as the seat.  Aside from the legs, the seating area should be the most substantial portion of a chair. 

As you can see with the one pictured on the left I cut a piece of plywood for the center.  This did not have to be exact because I was filling the crack with wood glue after taping the bottom side to hold the glue in place.

Then I began filling the crack with glue.  This took several applications due to waiting while the glue flowed downward.


After I was satisfied with the glue filling the crack I waited a few days for the glue to cure.  After curing, the bond will be stronger than most other parts of the chair.  Once the glue was cured I sanded it smooth and painted it white.


  Looks pretty good from that view, how about a close up.


Using an aged piece of plywood helped match the grain of the rest of the seat.  Now my wife may sell it as is or put an aged finish on it which would required some light sanding and staining.

Now it is time to tackle the other one.


Monday, September 15, 2008

How To Build A Sofa Table


With a few simple tools you can build your own dining room table or sofa table. Below are pictures of a sofa table I built last week. The same method applies to making a large farm table, but with extra cross members in the frame. All of this can be built with only a skill/circular saw and a hammer and nails. I have a table saw and miter saw, which make cutting straight lines very easy.

First thing to do is figure what size you want your table to be and if it needs to be an exact width. I recently made three farm tables 3’ x 8’. However the three top boards were 1x12, which means they are actually ¾” x 11-1/2”, my table was actually 34-1/2” wide instead of 36”. Not a problem for my client. Also, the legs for this table were 2x4. For large tables I use 4x4s tapered down.

For the table pictured the boards I started with were 1x12, but I only wanted the sofa table to be 16” wide so I ripped the boards down to 8” wide and used the remaining 3.5” as the frame. The lumber used for this project was:
2 – 1x8 @ 48”
2 – 1x4 @ 44”
3 – 1x4 @ 10-1/2”
4 – 2x4 @ 29” tapered down to 2x3

With my table top at 16” x 48” I figured the frame to be 2” smaller all around. I cut the boards to length and prepared to assemble them. I was using a hammer and #10 x 3” nails for this project. You should always predrill nail holes to prevent the wood from splitting.

I nailed the frame together then placed the top boards on the frame measuring 2” all around. Then I nailed the top boards in place. Afterward, I flipped it upside down on my worktable and nailed the legs on.
Our client wanted an antiqued rough looking table so I beat on the boards with a hammer and garden tool then scraped it with an awl.

The frame and legs were painted with a green latex paint. After the paint dried overnight, the painted areas were lightly sanded to remove some of the paint, but not all of it. Then the entire table was hand wiped with stain. The stain gives the painted areas an antiqued look and helps bring out the wood underneath. The table can be finished off with a clear coat of hand rubbed polyurethane or Orange Oil.

As you can see from the pictures this was all made on a little table in my back yard. It was started late one afternoon and finished quickly the next morning.

Tuesday, December 11, 2007

Christmas Crafts Coffee Table

Christmas Crafts Coffee Table

As Christmas draws nearer you might find you need a few gifts and you really do not know what to buy. Try making something. Crafting is easy and fun, you can also make some money on the side.

One of our most popular items is the window coffee table. We have made several of these from parts found on the side of the road. Except for the paint, all of the materials were free. Drive around on a Sunday afternoon to see what items people have put at the road for trash pickup. These are free so take whatever you may need. You are saving your local landfill by doing this. For the coffee table we used an old window, some short table legs and a few pieces of baseboard or crown molding(which I will call trim). Measure the window and cut the trim to fit around the window and form a skirt. Glue and nail these into place with the window top down. We use small brad nails. Then attach the legs to the inside of the trim with more glue and nails. Flip it over and you have a unique coffee table. Apply a couple of coats of paint so that all of the pieces match and you are finished.

You can go a step further and decorate the panes to create a shadow box. One table we did had sand and seashells on the panes. Another had pictures of our granddaughter. If you do something extra like this simply cut a piece of acrylic or plexiglass to fit the top, or you could have a piece of glass cut to fit. Sorry, but I could not find a picture of this one, email me for more details.

We found an excellent air compressor and brad nail gun combo kit at The Home Depot for $80. It has a small 1 gallon compressor and a 1-1/4” nail/staple gun. That is a great price.

Christmas Crafts Hall Tree


As Christmas draws nearer you might find you need a few gifts and you really do not know what to buy. Try making something. Crafting is easy and fun, you can also make some money on the side.

Another craft we like to make and sell at the antique mall is a hall tree. A hall tree is a piece of furniture that usually sits inside your front door with multiple storage areas. Here are some of the features that a hall tree might have. A seat with storage underneath, shelves, coat and hat hooks, drawers, mirror and a place for umbrellas.

Here is how we made the simple hall tree pictured. We found an old door, which was unusually narrow, but looked great. I left the knob in place for an added decorative look. I cut two pieces of stained wood to make the shelves. I screwed the shelves in from the back side of the door. Then I miter cut some crown molding to trim the shelves and attached them with glue and the nail gun. Then I supported the shelves with two old table legs and added feet for the bottom shelf. After that we painted everything except the shelves black and added some coat hooks. A framed mirror or piece of art would look nice hanging in the center. This was a very quick and easy project. Painting took the most time. I would suggest having someone help hold the parts in place for attachment. We sold this at the antique mall for $100. Not bad for something easy and fun to make.

We found an excellent air compressor and brad nail gun combo kit at The Home Depot for $80. It has a small 1 gallon compressor and a 1-1/4” nail/staple gun. That is a great price.